Goldfish Pond Construction
Whatever construction method you use, there are advantages and disadvantages with each material.
Goldfish pond construction can be broadly divided into three methods:
- Semi-permanent using polythene or vinyl film as liners
- Permanent but moveable using pre-made fiberglass or rigid plastic ponds and
- Permanent and immoveable using cement as the building material.
On this page, we discuss installing the semi-permanent options of polythene or vinyl liners.
For guidelines on installing a pond made from cement click here...
For guidelines on installing a pond made from pre-made fiberglass or rigid plastic click here...
Polythene (polyethylene) Film
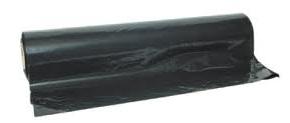
 Polythene film
The cheapest and quickest method of pond construction is using construction polythene film. The film can be placed in a hole dug in the ground or used as a liner in a container.
The sides of in-ground ponds should have a slight slope so they don’t collapse inwards when the pond is emptied, as the soil will dry out under the film.
Corners should have a radius to avoid getting an air gap under the liner which would make it susceptible to damage. The bottom of the pond should slope towards one end, or there should be a deep spot (or both) to aid draining.
Use some of the excavated soil to build up the rim of the pond to stop any ground water from flowing into the pond during heavy rain.
Decorative rocks or paving slabs can be used to hold the liner edges in place.

Ground preparation is everything when using any type of film as a liner. The water pressure presses the film hard against the ground surface. Any imperfections or sharp objects under the film will puncture it.
After the hole is dug, a thin layer of sand or sifted soil is put down. The deeper the pond, the greater the thickness of sand required because of the water pressure. A 12” deep pond would need a minimum of ½” of sand. A 24” deep pond would need 1” minimum. I tend to put a layer of polythene on top of the sand before the liner as an added layer of safety.

Use a spirit level to make sure the pond rim is roughly at the same level on all sides. Minor adjustments can be made after the pond is full of water.
Polythene film comes in black, clear and in different thicknesses. Thicker film resists puncture better, but it is harder to handle and fold neatly. The larger the pond, the thicker the film should be. Common film thicknesses are:
- 50 microns (0.05mm or 0.002") too thin for most pond applications
- 80 microns (0.08mm or 0.003") suitable for smaller ponds
- 125 microns (0.125mm or 0.005")
- 250 microns (0.25mm or 0.010").
Installation Method
The objective when filling the pond is to remove as many creases as possible.
The method is to stretch the film across the pond with the film a few inches off the bottom in the middle.
Add a gallon or so of water and let the weight of the water make the film touch the pond bottom. Slowly add water, releasing the film as the weight of the water pushes the film down and outwards to the sides of the pond. Ensure any creases are taken out as the pond slowly fills.

Tip:
Now is the time you will rip the film. Don't hold the film down so tightly with weights that it tears as it slides from underneath it or the weight slides into the pond puncturing it.
Been there, done that!
The trick is to slowly fill the pond, giving yourself time to release the film evenly as the weight of water increases the tension on the film. Don't use weights with sharp edges.
It is useful to have a few helpers at this critical stage.
It would pay to purchase a repair kit when you purchase the polythene film. Repair kits consist of polythene tape or patches with a waterproof glue on one side.
Once the film covers the entire bottom, fold the excess film that will collect in the corners neatly. The same exercise applies to round ponds, but you will have to fold the excess film at regular intervals around the sides.
Advantages:
- Cheap to buy, readily available
- Quick to install
- Slight ground movement is less of an issue
- The pond is easily de-constructed.
Disadvantages:
- Easily punctured from nets, insects and tree roots or during installation
- Black film can cause water to overheat in shallow ponds, but the clear film breaks down fairly rapidly in sunlight
- Hard to make polythene look neat
- Hard to use on irregular shaped ponds.
Vinyl Liners (polypropylene)
Vinyl pond liners are the next easiest option after polythene film.
The same construction rules apply for these with ground preparation being the key to avoiding leaks. The liner should come with instructions regarding installation and ground preparation. If it doesn't, follow the guide for polythene film.
Polypropylene liners are UV stabilized, non-toxic and repair kits are either supplied with the liner or are available from the supplier. The liners are supplied cut to various sizes, or can be made to your requirements.
The liners also come in various thicknesses:
- 300 microns (0.3mm)
- 500 microns (0.5mm)
- 750 microns (0.75mm)
- 1000 microns (1.00mm)
Installation Method
The installation method is slightly different from polythene film. The liner is designed to stretch, so avoiding ugly creases.
Ideally the vinyl is put out in the sun to heat which assists stretching. The same method for installing film is used but if the stretching is done correctly, there shouldn’t be any creases or folding necessary.
If possible, don’t use swimming pool vinyl liners. The manufacturers often put anti algal chemicals into the vinyl. If you do use one, let the pond stand full of water for a few weeks, empty, refill and test with inexpensive fish for a few more weeks.
Advantages:
- Quick to install
- Slight ground movement is less of an issue
- The pond is easily de-constructed.
- UV stable
Disadvantages:
- Easily punctured from nets, insects and tree roots or during installation.
- Needs to be re-stretched if the pond is left empty for any length of time.
- swimming pool liners may be toxic
- Limited to simple shapes.
Maintaining Goldfish ponds constructed from liners is more difficult due to the fragility of the liner material. You can't climb into the pond and use a stiff broom to clean algae off the sides. The Goldfish Pond Setup page gives some options that help reduce the need for cleaning.
For a more permanent pond structure, the most common construction methods are using cement, or pre-made fiberglass or rigid plastic ponds.


