| Back to Back Issues Page |
 |
|
The Goldfish Gazette, Issue #078 Brine Shrimp June 30, 2020 |
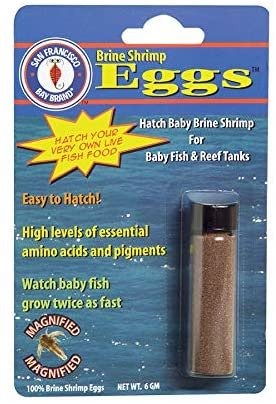
Goldfish Care TipsA Free Monthly Resource For Goldfish Enthusiasts In This Issue If you are intending to breed Goldfish, you need to ensure a plentiful food source is available, especially for the first 2-3 weeks. Brine Shrimp With the Northern hemisphere breeding season well under-way, I have been receiving emails lately concerning what to feed fry. First foodTo raise a spawn successfully, fry must have high protein food available as soon as they are free swimming.Feeding cannot be delayed, even by a few days as the fry will be stunted. Fry increase in size between 40-50% every week for the first two weeks. To achieve this growth rate, fry need to consume a lot of food, and if you have had a reasonable spawn, you will have several thousand fry to feed. So, what high protein live food can fry eat as a first food for their first two weeks? There are really only two options, infusoria and brine shrimp nauplii. Liquid and finely powdered fry foods are available, but they have two big disadvantages: 1. They pollute the water easily If you choose to feed infusoria, the number of containers needed to sustain a reasonably sized spawn of several thousand fry over two weeks will be huge. The easier option is newly hatch brine shrimp. One 1quart (liter) hatchery will hatch 500,000 nauplii. Fry that have just become free swimming need about 10-15 nauplii over 2-3 feeds per day for the first few days, more as they get bigger. Advantages of brine shrimp are: • Available from your nearest local fish store Disadvantages are you need a hatchery, the eggs (cysts) need to be kept at 80oF (26-28oC), and they are reasonably expensive compared to other foods. How to Hatch Brine Shrimp SuccessfullySome aquarists have difficulty hatching brine shrimp in sufficient numbers. For a reasonable sized spawn, you need to hatch large quantities daily, and reliably for at least two weeks.The instructions on the packets and containers the eggs come in cover the basics, but there are a few “traps” that are not mentioned. Test to ensure eggs are viable. Eggs come in sealed containers for a reason. If they are exposed to any moisture whatsoever, they will be spoiled. As I buy brine shrimp in larger quantities, I keep them in the freezer between seasons, and in the fridge during the breeding season. Do a test hatching before you need them, even if they are recently purchased as you don’t know for certain how they have been stored. The eggs must not be allowed to settle in the hatchery. Don’t use an air stone to aerate the water as they clog and reasonable air pressure is required to create bubbles. I use thin rigid tubing scavenged from under gravel filters. The tube has an ID (internal dimension) of about 3mm. The advantage of using this tubing is very little air pressure is required to create bubbles, and the bubbles created are quite large. Air stones can create froth if the bubbles are small. This lifts many eggs up the sides of the hatchery where they will not hatch. I use plastic fruit juice containers for my hatcheries, and mount them upside down. The advantage of this is any eggs that settle in the narrow neck where I place my rigid tubing are picked up and returned to the water column. Maximizing Hatch NumbersBrine shrimp are quite expensive, so you want to maximize each hatch. I allow 36 hours for all the eggs in a batch to hatch. Hatching starts after 18 hours.Two hatchery containers are required. The first container is seeded the morning before the first feed is required (when you expect your fry to be free swimming). The second container is seeded the following morning. You feed hatched nauplii to your fry from the first container, with a second feed at the end of the day. The first container is now ready for seeding the following morning. Continue this cycle until the fry are too large for brine shrimp. To read more about brine shrimp, click here... To learn how to build a cheap brine shrimp hatchery, click here...
Comments? Ideas? Feedback? I'd love to hear from you. Just reply to this e-zine and tell me what you think, or what topics you want covered. Next Month's Topic Goldfish proof plantswww.facebook.com/aboutgoldfish |
| Back to Back Issues Page |